
You have no items in your shopping cart.


How To Update Firmware for the DJI Phantom 3 Professional and Advanced
Updated April 2017
The DJI Phantom 3 Standard is the basic model of the 2015 Phantom 3 drone series. The P3 Standard is $500+ and lacks many of the new features such as 4k resolution, lightbridge signal range, sensors, GLONASS GPS, etc, so we HIGHLY recommend upgrading to the new DJI Mavic Pro which starts at $749.
|
Firmware updates can fix bugs or add new features to your Phantom 3 drone. That's why it's important to keep your drone's firmware up to date. To help you along, we've added this step-by-step guide for your Phantom 3 firmware update. We've also added direct file links to each firmware update. There are two apps to download: DJI Go on mobile and DJI Assistant on desktop/laptop. Download DJI Assistant 2 before you access the latest firmware. Find it here:
Below is a list of firmware updates (ZIP) listed by version:
Before you begin, make sure:
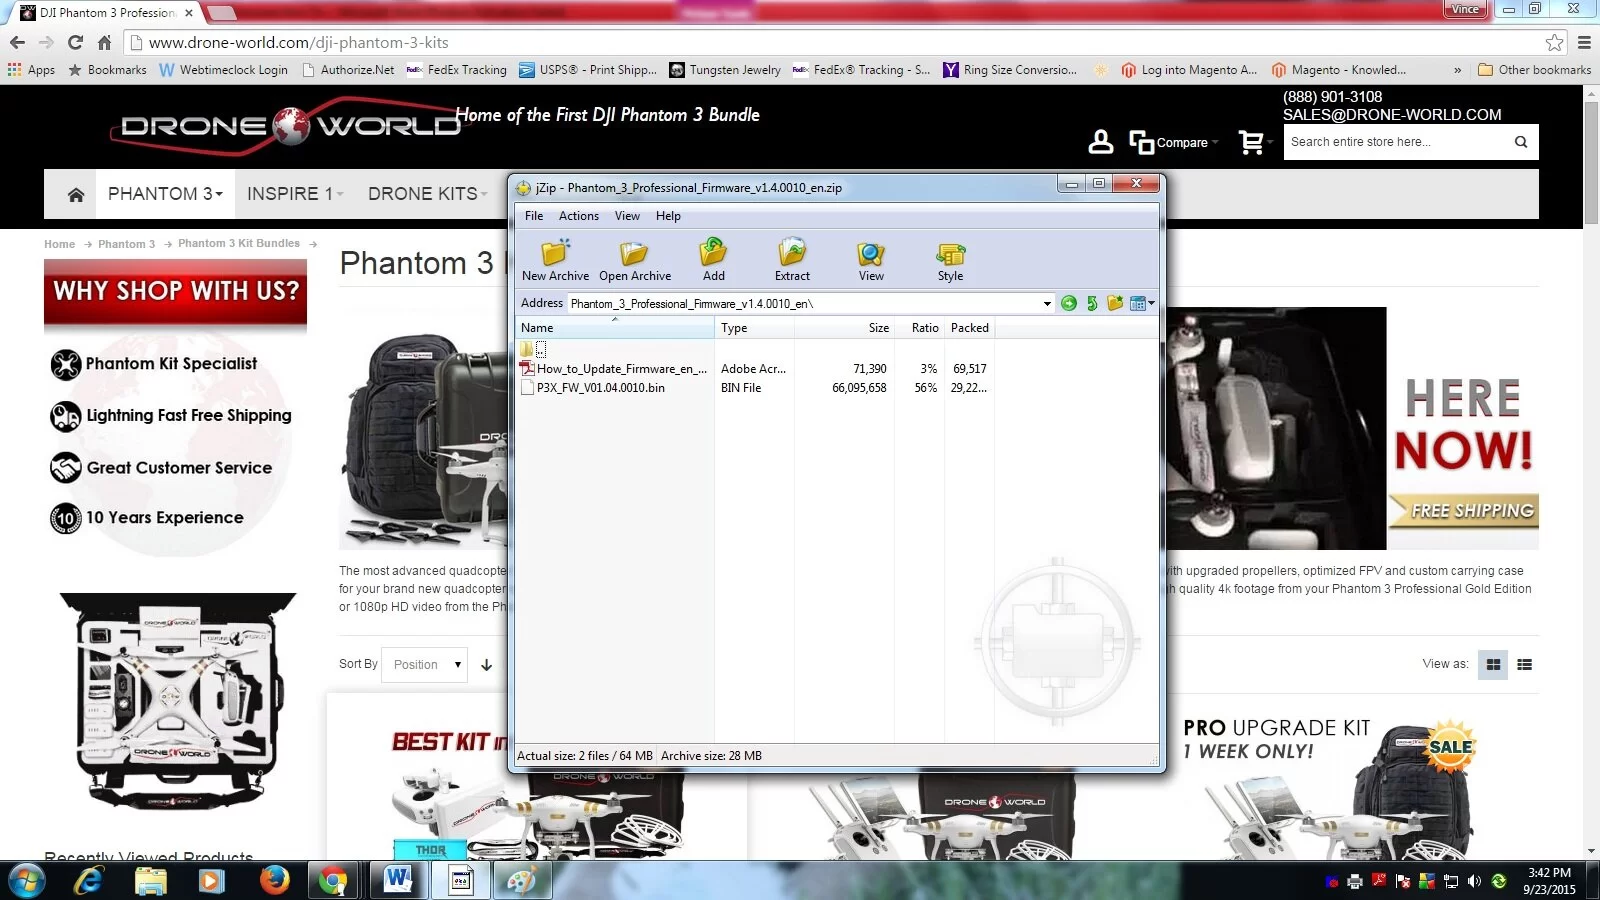
How to Update: Follow these instructions carefully. Do not skip any steps and read through all instructions before starting update: Step 1: Go to http://www.dji.com/product/phantom-3/download and download the firmware update that corresponds to your aircraft model (Professional or Advanced) Step 2: The download will save to your computer as a zip file, open the file and you should see the following or very similar:
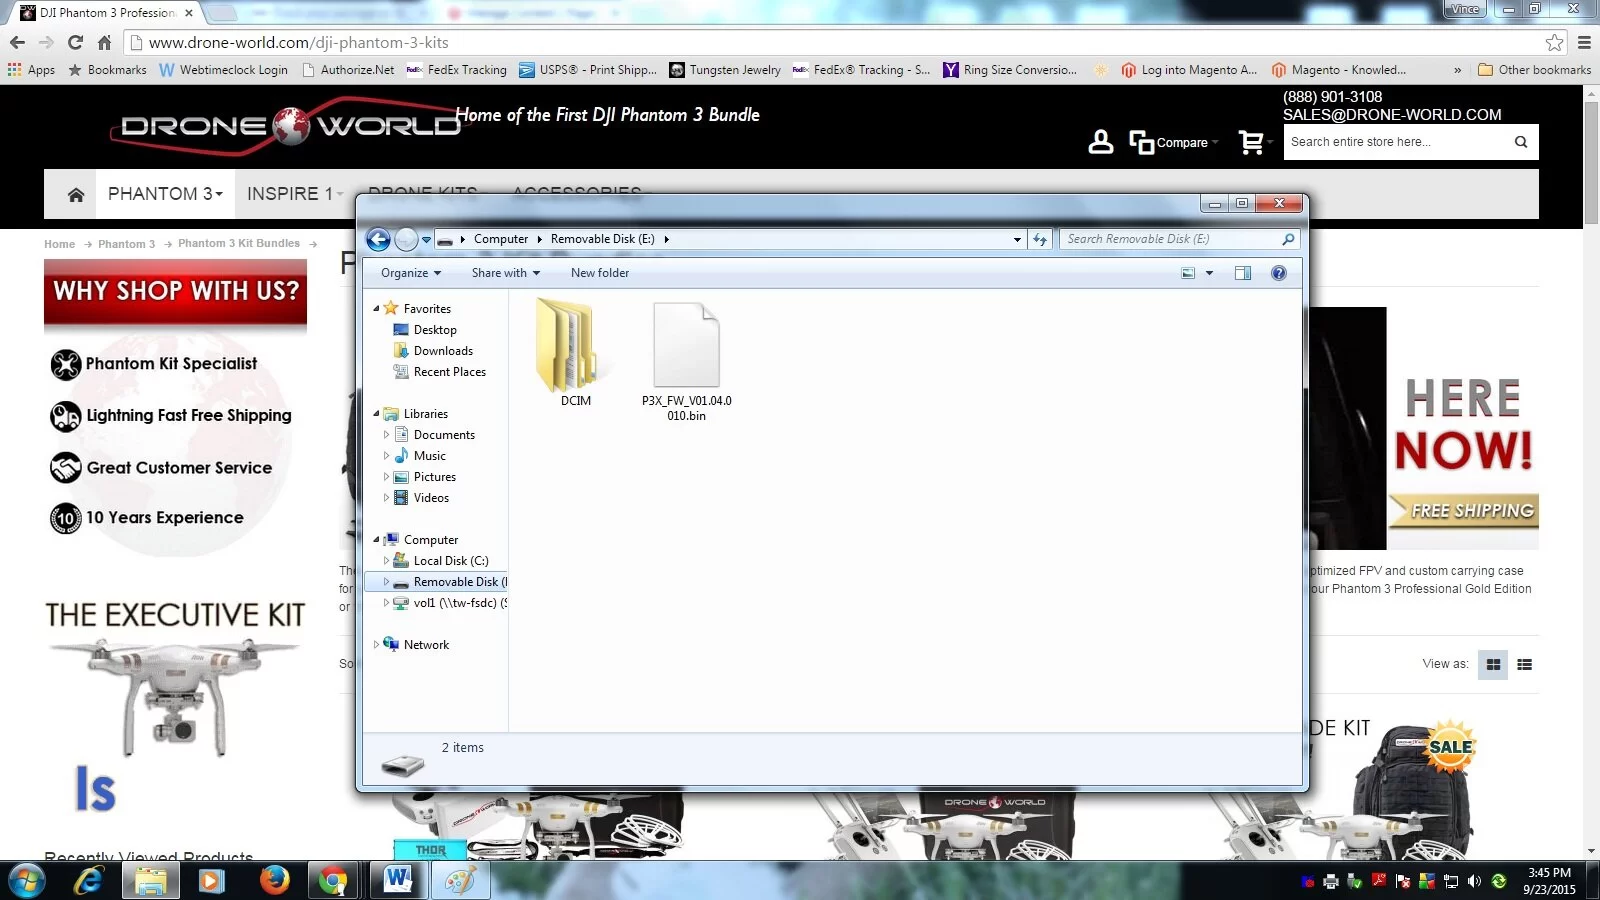
Step 3: Remove the SD card from the gimbal of the aircraft and insert into your computer via its SD slot or by using an USB card reader. Go back to download’s zip folder and extract ONLY the .bin file (you can also right click the .bin and copy and past the file next to the DCIM folder of your SD card – it is very important that only the .bin be placed on the card, if the text file is also present your update will not upload to the aircraft properly). Once properly added to the SD card, the firmware file should appear in the SD card on your computer like the image below:
Step 4: Make sure your aircraft is off. Remove SD card from your computer or USB reader and slide it back into gimbal. It will click in place. Ensure your aircraft’s battery is at least 50% and then turn on aircraft with SD card already inside. (Remote controller should remained powered off during this process and gimbal clamp should be removed from aircraft) - The firmware update begin automatically and take about 25 minutes to complete. While the aircraft is updating, the status indicator light just above the camera will flash from green to red and the drone will beep "D-D-D-D." Once the light is solid green and the beeping changes to "D-DD," the process is complete and the aircraft can be turned off. Step 5: After the status indicator light shows solid green and your aircraft has been turned off, remove the SD card and again insert it into your computer or USB reader. Open the SD card’s folder to display the .bin and a .txt file with the firmware upgrade’s results. Open the text file and confirm “success” status for the upgrade. It should appear similar to below(if status is “failed” delete .txt file and attempt firmware update again):
IMPORTANT: Delete both the .txt file and .bin file after firmware update is confirmed. If left on the SD card when inserted back into the drone, aircraft will not function properly.
Updating Remote Controller Firmware
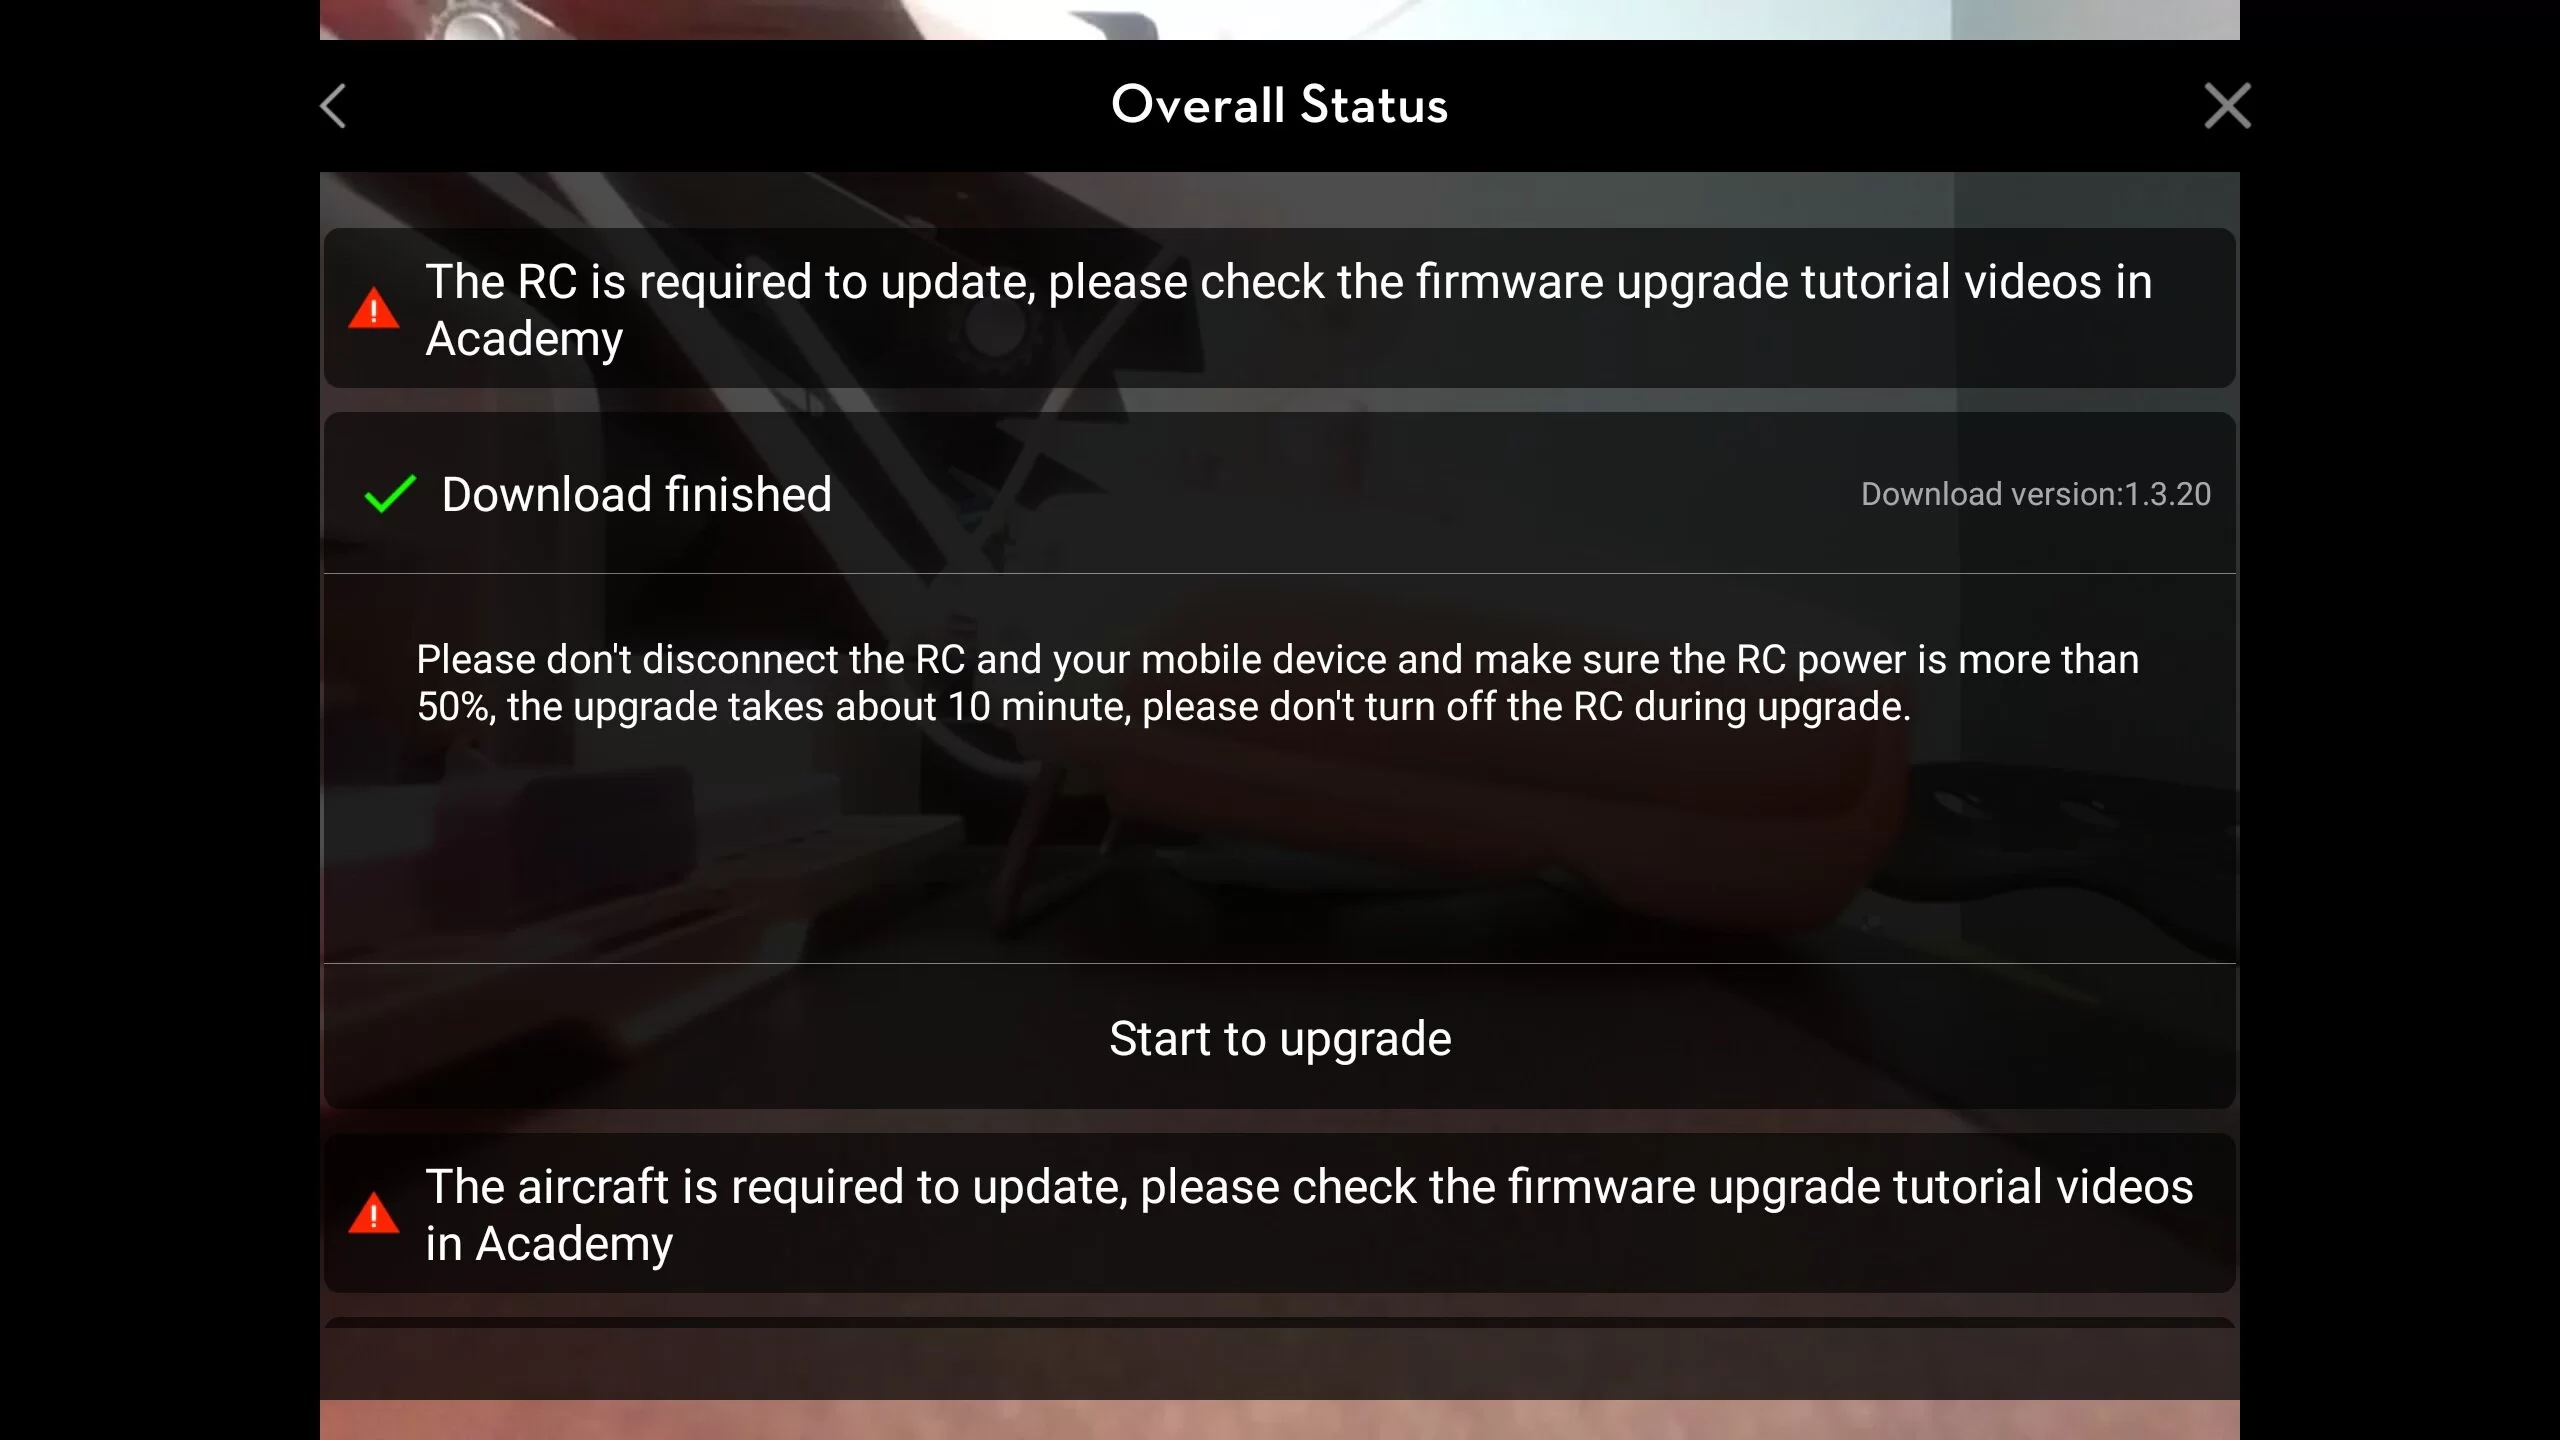
Before starting update, make sure your DJI GO app is up to date, your mobile device or tablet has internet access and remote controller has at least 50% battery level. Step 1: Turn on remote controller and plug in the tablet or mobile device with the DJI GO app on it. Once plugged into the remote controller, launch DJI GO app if it has not come up after plugging in. Step 2: Enter Camera View and then Tap the System Status bar at the top center of the app. The update prompt will appear under Overall Status, tap the update and download the firmware package.
Step 3: Once Download has finished, tap Start to Upgrade in app. LED light on remote will blink blue during update, then turn solid green when complete.
Step 4: Once the upgrade is complete, turn remote off and on. You're now ready to fly!
So there you have it: How to install your Phantom 3 firmware update! It's important to know how important Phantom 3 firmware is to you and your Phantom 3 quadcopter. Each update can resolve critical problems. An update can also serve as a Phantom 3 upgrade, creating new features and improving old, including download and streaming speeds. Updates have also improved the Phantom 3 camera quality and Phantom 3 antenna response, among other things.
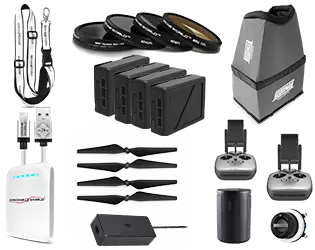
Don't forget to check out Drone World to find the best Phantom 3 accessories, Phantom 3 mods, and Phantom 3 bundles on the market. And remember that you can trust Drone World for the best value on your Inspire 1, Osmo, Phantom 3, and Phantom 4 drones!
You May Also Like: |
.